修改AndroidManifest.xml,於scroll view對應的activity裡設定windowSoftInputMode
ex:
<activity
android:name=".AddFoodActivity"
android:label="@string/app_name"
android:windowSoftInputMode="stateHidden" >
</activity>
2013年8月29日 星期四

2013年8月28日 星期三
2013年8月27日 星期二
設定action bar
XML
<menu xmlns:android="http://schemas.android.com/apk/res/android" >
<item
android:id="@+id/action_done"
android:showAsAction="always"
android:title="完成"
/>
</menu>
JAVA
@Override
public boolean onCreateOptionsMenu(Menu menu) {
// Inflate the menu items for use in the action bar
MenuInflater inflater = getMenuInflater();
inflater.inflate(R.menu.done, menu);
return super.onCreateOptionsMenu(menu);
}
@Override
public boolean onCreateOptionsMenu(Menu menu) {
// Inflate the menu items for use in the action bar
MenuInflater inflater = getMenuInflater();
inflater.inflate(R.menu.done, menu);
return super.onCreateOptionsMenu(menu);
}
button被點選
public boolean onOptionsItemSelected(MenuItem item) {
return true;
}
設定透明顏色
XML:
<ImageButton
android:layout_width="wrap_content"
android:layout_height="wrap_content"
android:layout_toRightOf="@+id/addFecesDiarrheaButton"
android:layout_alignBottom="@+id/addFecesCountLabel"
android:src="@drawable/irregularity"
android:background="@android:color/transparent"
/>
JAVA:
addFoodButton.setBackgroundColor(Color.TRANSPARENT);
2013年8月26日 星期一
利用picker設定日期和時間
ex:
dateButton.setOnClickListener(new View.OnClickListener() {
@Override
public void onClick(View v) {
// TODO Auto-generated method stub
DatePickerDialog dialog = new DatePickerDialog(AddFecesActivity.this, new DatePickerDialog.OnDateSetListener() {
@Override
public void onDateSet(DatePicker view, int year, int monthOfYear,
int dayOfMonth) {
// TODO Auto-generated method stub
currentTime.set(0, currentTime.minute, currentTime.hour, dayOfMonth,
monthOfYear,year);
String timeStr = currentTime.format("%Y-%m-%d");
dateButton.setText(timeStr);
}
}, currentTime.year, currentTime.month, currentTime.monthDay);
dialog.show();
}
});
timeButton.setOnClickListener(new View.OnClickListener() {
@Override
public void onClick(View v) {
// TODO Auto-generated method stub
TimePickerDialog dialog = new TimePickerDialog(AddFecesActivity.this, new TimePickerDialog.OnTimeSetListener(){
@Override
public void onTimeSet(TimePicker view, int hourOfDay, int minute) {
currentTime.set(0, minute, hourOfDay, currentTime.monthDay,
currentTime.month+1, currentTime.year);
String timeStr = currentTime.format("%H:%M");
timeButton.setText(timeStr);
}
}, currentTime.hour, currentTime.minute,
false);
dialog.show();
}
});
XML Drawables
Layer List
State List
Level List
TransitionDrawable
InsetDrawable
ClipDrawable
ScaleDrawable
ShapeDrawable
http://www.vogella.com/articles/AndroidDrawables/article.html
9-patch image
http://radleymarx.com/blog/simple-guide-to-9-patch/
http://www.ootpapps.com/2013/02/android-9-patch-imageshow-they-work-and-how-to-create-them/


http://www.ootpapps.com/2013/02/android-9-patch-imageshow-they-work-and-how-to-create-them/


draw 9 patch image
draw9patch
2013年8月25日 星期日
fragment
A Fragment represents a behavior or a portion of user interface in an Activity. You can combine multiple fragments in a single activity to build a multi-pane UI and reuse a fragment in multiple activities. You can think of a fragment as a modular section of an activity, which has its own lifecycle, receives its own input events, and which you can add or remove while the activity is running (sort of like a "sub activity" that you can reuse in different activities).
AdapterView
You have a data set, you throw it at an Adapter, and you end up with views in your layout

ex:
ListView


Adapter is the interface that takes a data set and returns views representing that data. The adapter is able to say how many items there are, return an item for a specific position, and return the view associated with a position, among other things. For a ListView, you will use the ListAdapter interface that extends Adapter to add a couple of list-specific methods. Similarly, you will use the SpinnerAdapter interface for use in a Spinner.

ex:
ListView

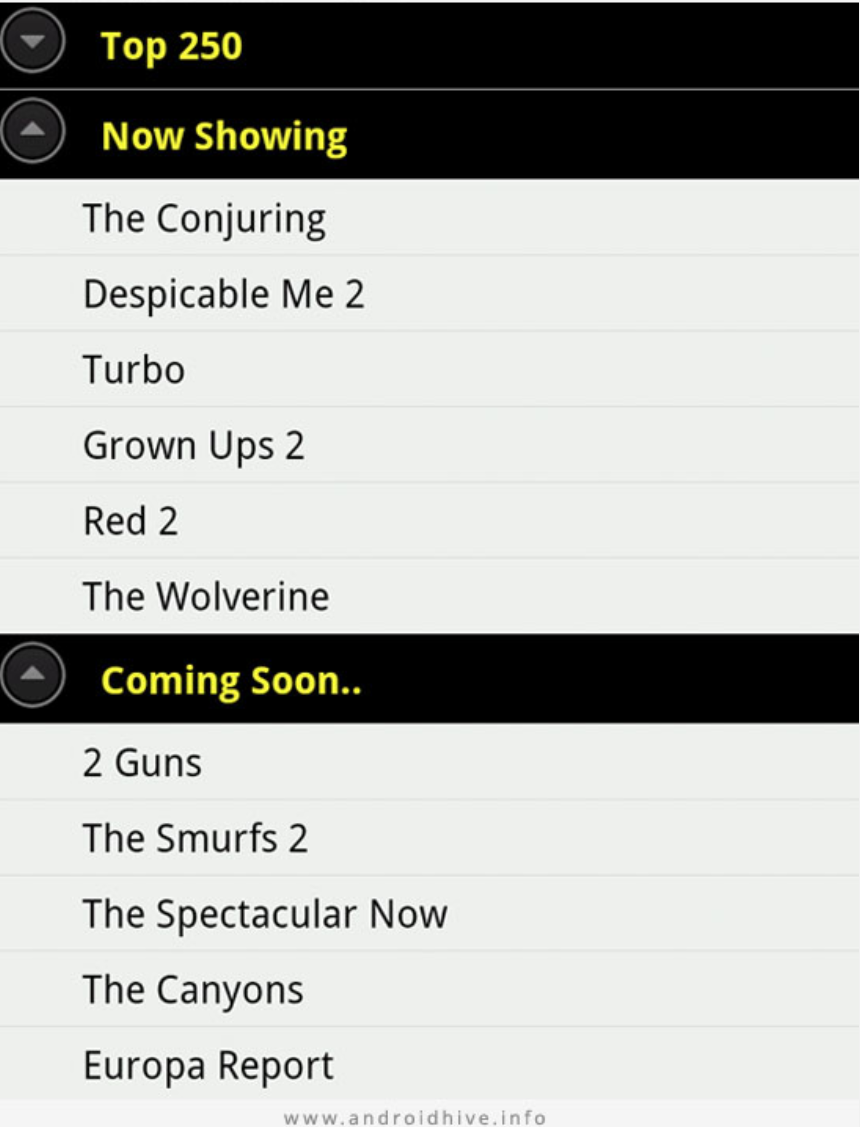
ExpandableListView
group list data by categories. It has the capability of expanding and collapsing the groups when user touches header.
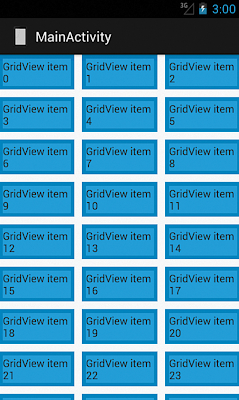
GridView

Spinner

ViewPager
gravity and layout_gravity
android:gravity sets the gravity of the content of the View its used on.
android:layout_gravity sets the gravity of the View or Layout in its parent.
ex:
<Button
android:id="@+id/addFoodDateButton"
android:layout_width="140dp"
android:layout_height="40dp"
android:layout_marginTop="12dp"
android:layout_marginLeft="12dp"
android:textColor="#000000"
android:background="@android:color/transparent"
android:layout_toRightOf="@id/addFoodDateTitleImageView"
android:text="2013-09-12"
android:gravity="left|center_vertical"
/>
android:gravity
center_vertical, top , bottom
ex:
calorieTextView.setGravity(Gravity.CENTER);
ViewGroup
the ViewGroup class is for views that can contain one or more child views. ViewGroup provides the standardized methods for these classes to use so that they can perform tasks such as adding, removing, getting, and counting child views.
Iterating through a ViewGroup’s Children
ex:
final int childCount = myViewGroup.getChildCount();
for (int i = 0; i < childCount; i++) {
View v = myViewGroup.getChildAt(i);
// Do something with the View
}
FrameLayout
LinearLayout
RelativeLayout
ListView
GridView
Spinner
ViewPager
AdapterViewAnimator
AdapterViewFlipper
AppWidgetHostView
DialerFilter
FragmentBreadCrumbs
GestureOverlayView
GridLayout
HorizontalScrollView
ImageSwitcher
MediaController
PagerTabStrip
PagerTitleStrip
ScrollView
SearchView
SlidingDrawer
StackView
TabHost
TabWidget
TableLayout
TableRow
TextSwitcher
ViewAnimator
ViewFlipper
ViewSwitcher
ZoomControls
圖片縮放
scaleType


resize bitmap:
int width = 1000;
int height = 500;
Bitmap resizeBitmap = Bitmap.createScaledBitmap(oldBitmap, width, height, true);
JAVA:
categoryButton.setScaleType(ImageView.ScaleType.FIT_XY );
XML:
<ImageButton
android:id="@+id/foodDetailBigBut"
android:layout_width="match_parent"
android:layout_height="match_parent"
android:layout_alignTop="@+id/foodDetailViewPager"
android:layout_alignLeft="@+id/foodDetailViewPager"
android:src="@drawable/bigbut"
android:scaleType="fitXY"
android:background="@android:color/transparent"
/>
維持比例縮放: centerCrop & centerInside
不維持比例,縮放到指定的大小: fitXY
android UI元件基本介紹
TextView: 顯示文字
EditText: 輸入文字
Button: 按鈕
ImageView: 顯示圖片
ImageButton: 顯示圖片的button
CheckBox, RadioButton, Switch , ToggleButton


TimePicker
 AnalogClock

Chronometer
DigitalClock
KeyboardView
MediaRouteButton
QuickContactBadge
ProgressBar

WebView
VideoView
EditText: 輸入文字
Button: 按鈕
ImageView: 顯示圖片
ImageButton: 顯示圖片的button
CheckBox, RadioButton, Switch , ToggleButton

CalendarView

CheckedTextView
DatePicker
RatingBar

SeekBar
Spinner


Chronometer
DigitalClock
KeyboardView
MediaRouteButton
QuickContactBadge
ProgressBar
WebView
VideoView
2013年8月23日 星期五


2013年8月22日 星期四
鍵盤(keyboard)樣式

設定inputType
ex:
<EditText android:layout_width="match_parent"
android:layout_height="40dp"
android:inputType="textEmailAddress"
android:layout_marginTop="10dp"
android:textColor="#000000"/>
輸入數字和小數點: numberDecimal
只能輸入數字:
android:inputType="phone"
android:digits="1234567890"
設定顏色(color)和顏色的透明度
在XML裡設定
ex:
<EditText android:layout_width="match_parent"
android:layout_height="40dp"
android:inputType="textEmailAddress"
android:layout_marginTop="10dp"
android:textColor="#000000"/>
如果有4個byte,第一個byte設定透明度
ex:
#00000000
從Java設定
ex:
seperatorView.setBackgroundColor(Color.argb(51, 255, 255, 255));
wordTextView2.setTextColor(Color.rgb(0,0,0));
ex:
calorieView.getBackground().setAlpha(127);
ex:
<EditText android:layout_width="match_parent"
android:layout_height="40dp"
android:inputType="textEmailAddress"
android:layout_marginTop="10dp"
android:textColor="#000000"/>
如果有4個byte,第一個byte設定透明度
ex:
#00000000
從Java設定
ex:
seperatorView.setBackgroundColor(Color.argb(51, 255, 255, 255));
wordTextView2.setTextColor(Color.rgb(0,0,0));
ex:
calorieView.getBackground().setAlpha(127);


margin and padding
margin: 外部間距,和其它UI元件的間距
padding: 內部間距,UI元件自己內部的間距

ex:
android:paddingBottom="20dp"
ex:
layoutParams.setMargins(0, normalCalorieTextViewStartY, 0, 0);
padding: 內部間距,UI元件自己內部的間距

ex:
android:paddingBottom="20dp"
ex:
layoutParams.setMargins(0, normalCalorieTextViewStartY, 0, 0);
2013年8月20日 星期二
action bar overlay
設定action bar overlay ( themes.xml)
<resources>
<style name="FitMiTheme" parent="@android:style/Theme.Holo">
<item name="android:windowActionBarOverlay">true</item>
</style>
設定UI在action bar之後
從XML
<LinearLayout android:layout_width="match_parent"
android:layout_height="wrap_content"
android:orientation="horizontal"
android:paddingTop="?android:attr/actionBarSize" >
從Java
TypedValue tv = new TypedValue();
this.getTheme().resolveAttribute(android.R.attr.actionBarSize, tv, true);
int actionBarHeight = getResources().getDimensionPixelSize(tv.resourceId);
layoutParams.setMargins(0, actionBarHeight, 0, 0);
layout
for layout_height & layout_width:
match_parent & wrap_content
relative layout:
http://developer.android.com/reference/android/widget/RelativeLayout.LayoutParams.html
it also allows you to create overlapping views and views that appear to float on top of others.

linear layout :
延著水平或垂直排列
android:orientation="horizontal"
或
android:orientation="vertical"
ex:
<LinearLayout android:layout_width="match_parent"
android:layout_height="wrap_content"
android:orientation="horizontal" >
<Button android:text="add"
android:layout_width="0px"
android:layout_height="wrap_content"
android:layout_weight="1"
/>
FrameLayout
<Button android:text="subtract"
android:layout_width="0px"
android:layout_height="wrap_content"
android:layout_weight="1"
/>
</LinearLayout>
說明:
一樣的weight,兩個button平分畫面 。記得width的寬度要設成0px。
FrameLayout
http://www.onlymobilepro.com/2012/05/22/android-frame-layout-for-absolute-beginner/
一層一層疊view。
java:
layoutParams.addRule(RelativeLayout.BELOW, titleTextView.getId());
RelativeLayout.LayoutParams layoutParams = new RelativeLayout.LayoutParams(
LayoutParams.MATCH_PARENT, LayoutParams.MATCH_PARENT);
match_parent & wrap_content
relative layout:
http://developer.android.com/reference/android/widget/RelativeLayout.LayoutParams.html
it also allows you to create overlapping views and views that appear to float on top of others.

ex:
android:layout_centerHorizontal="true"
android:layout_toRightOf="@+id/addPeriodStartDateTitleImageView"
linear layout :
延著水平或垂直排列
android:orientation="horizontal"
或
android:orientation="vertical"
ex:
<LinearLayout android:layout_width="match_parent"
android:layout_height="wrap_content"
android:orientation="horizontal" >
<Button android:text="add"
android:layout_width="0px"
android:layout_height="wrap_content"
android:layout_weight="1"
/>
FrameLayout
<Button android:text="subtract"
android:layout_width="0px"
android:layout_height="wrap_content"
android:layout_weight="1"
/>
</LinearLayout>
說明:
一樣的weight,兩個button平分畫面 。記得width的寬度要設成0px。
FrameLayout
http://www.onlymobilepro.com/2012/05/22/android-frame-layout-for-absolute-beginner/
一層一層疊view。
java:
layoutParams.addRule(RelativeLayout.BELOW, titleTextView.getId());
RelativeLayout.LayoutParams layoutParams = new RelativeLayout.LayoutParams(
LayoutParams.MATCH_PARENT, LayoutParams.MATCH_PARENT);
設定背景圖片或背景顏色
每個UI元件都有background attribute
設定activity的xml:
<RelativeLayout xmlns:android="http://schemas.android.com/apk/res/android"
xmlns:tools="http://schemas.android.com/tools"
android:layout_width="match_parent"
android:layout_height="match_parent"
android:background="@drawable/mainbackground"
tools:context=".MainActivity" >
<RelativeLayout xmlns:android="http://schemas.android.com/apk/res/android"
xmlns:tools="http://schemas.android.com/tools"
android:layout_width="match_parent"
android:layout_height="match_parent"
android:background="#000000"
tools:context=".MainActivity" >
theme and style
http://mobile.tutsplus.com/tutorials/android/android-sdk-exploring-styles-and-themes/
1. create values/themes.xml
ex:
<?xml version="1.0" encoding="utf-8"?>
<resources>
<style name="TestTheme" parent="android:Theme.Light">
</style>
</resources>
2. modify AndroidManifest.xml
ex:
<application
android:allowBackup="true"
android:icon="@drawable/ic_launcher"
android:label="@string/app_name"
android:theme="@style/TestTheme" >
2013年8月19日 星期一
App Icon image & Icon title
AndroidManifest.xml
<?xml version="1.0" encoding="utf-8"?>
<manifest xmlns:android="http://schemas.android.com/apk/res/android"
package="com.cookbook.simple_activity"
android:versionCode="1"
android:versionName="1.0">
<application android:icon="@drawable/icon"
android:label="@string/app_name">
<activity android:name=".SimpleActivity"
android:label="@string/app_name">
app version
AndroidManifest.xml
<manifest xmlns:android="http://schemas.android.com/apk/res/android"
package="com.cookbook.simple_activity"
android:versionCode="1"
android:versionName="1.0">
2013年8月18日 星期日

android version
android version比例圖表


AndroidManifest.xml:
設定minimum required SDK version and the target SDK version
ex:
<uses-sdk
android:minSdkVersion="8"
android:targetSdkVersion="17" />
說明:
minSdkVersion: API >= 8 的皆可安裝
Target SDK version: 一般採用最新的SDK
Build SDK version: 一般採用最新的SDK
設定Build SDK Version


檢查device的version
ex:
if (Build.VERSION.SDK_INT >= Build.VERSION_CODES.HONEYCOMB) {
}
API version
http://developer.android.com/guide/topics/manifest/uses-sdk-element.html#ApiLevels

設定起始畫面activity( launcher activity )
在AndroidManifest.xml:
ex:
<application
... >
<activity
android:name="com.bignerdranch.android.geoquiz.QuizActivity"
android:label="@string/app_name" >
<intent-filter>
<action android:name="android.intent.action.MAIN" />
<category android:name="android.intent.category.LAUNCHER" />
</intent-filter>
</activity>
<activity
android:name=".CheatActivity"
android:label="@string/app_name" />
</application>


2013年8月16日 星期五
activity的啟動和返回和intent
intent:
Your app should handle reasonable Intents, which is the class Android uses to indicate what the user is trying to do and to find an appropriate app to accomplish that objective
說明:
android會依據intent尋找相關的App來給使用者挑選
利用intent
public void startActivity(Intent intent);

ex:
Intent i = new Intent(QuizActivity.this, CheatActivity.class);
startActivity(i);
說明:
顯示另一個activity,原本activity的onStop被呼叫.
當按下back鍵後,將回到原來的activity
在activity間傳遞資訊: 透過intent的putExtra & getIntent
ex:
Intent i = new Intent(MainActivity.this, CheatActivity.class);
boolean answerIsTrue = mAnswerKey[mCurrentIndex].isTrueQuestion();
i.putExtra(CheatActivity.EXTRA_ANSWER_IS_TRUE, answerIsTrue);
startActivity(i);
說明:傳送
mAnswerIsTrue = getIntent().getBooleanExtra(EXTRA_ANSWER_IS_TRUE, false);
Getting a result back from a child activity

1.
parent activity呼叫
public void startActivityForResult(Intent intent, int requestCode);
說明 :
之後才能夠取得child activity回傳的資料
2.
child activity呼叫
public final void setResult(int resultCode, Intent data);
說明:
回傳結果和Intent,資料包在intent裡。結果有2種:
Activity.RESULT_OK
Activity.RESULT_CANCELED.
這裡的intent有兩種產生方法:
1. Intent data = new Intent();
2. Intent i = getIntent();
get the intent that start this activity
3. parent activity經由onActivityResult取得資料
ex:
protected void onActivityResult(int requestCode, int resultCode, Intent data) {
if (data == null) {
return;
}
mIsCheater = data.getBooleanExtra(CheatActivity.EXTRA_ANSWER_SHOWN, false);
}
說明:
利用requestCode判斷是從哪個activity回來
返回:
按下back鍵或是activity物件呼叫finish method
Explicit intents:
explicitly defines the component which should be called by the Android system, by using the Java class as identifier.
ex:
Intent i = new Intent(this, ActivityTwo.class);
Implicit Intents:
Implicit intents specify the action which should be performed and optionally data which provides data for the action.
ex:
Intent i = new Intent(Intent.ACTION_VIEW, Uri.parse("http://www.vogella.com"));
startActivity(i);
說明:
The most commonly used intent filter is an action,
Your app should handle reasonable Intents, which is the class Android uses to indicate what the user is trying to do and to find an appropriate app to accomplish that objective
說明:
android會依據intent尋找相關的App來給使用者挑選
利用intent
public void startActivity(Intent intent);

ex:
Intent i = new Intent(QuizActivity.this, CheatActivity.class);
startActivity(i);
說明:
顯示另一個activity,原本activity的onStop被呼叫.
當按下back鍵後,將回到原來的activity
在activity間傳遞資訊: 透過intent的putExtra & getIntent
ex:
Intent i = new Intent(MainActivity.this, CheatActivity.class);
boolean answerIsTrue = mAnswerKey[mCurrentIndex].isTrueQuestion();
i.putExtra(CheatActivity.EXTRA_ANSWER_IS_TRUE, answerIsTrue);
startActivity(i);
說明:傳送
mAnswerIsTrue = getIntent().getBooleanExtra(EXTRA_ANSWER_IS_TRUE, false);
說明: 取得
Getting a result back from a child activity

1.
parent activity呼叫
public void startActivityForResult(Intent intent, int requestCode);
說明 :
之後才能夠取得child activity回傳的資料
2.
child activity呼叫
public final void setResult(int resultCode, Intent data);
說明:
回傳結果和Intent,資料包在intent裡。結果有2種:
Activity.RESULT_OK
Activity.RESULT_CANCELED.
這裡的intent有兩種產生方法:
1. Intent data = new Intent();
2. Intent i = getIntent();
get the intent that start this activity
3. parent activity經由onActivityResult取得資料
ex:
protected void onActivityResult(int requestCode, int resultCode, Intent data) {
if (data == null) {
return;
}
mIsCheater = data.getBooleanExtra(CheatActivity.EXTRA_ANSWER_SHOWN, false);
}
說明:
利用requestCode判斷是從哪個activity回來
返回:
按下back鍵或是activity物件呼叫finish method
Explicit intents:
explicitly defines the component which should be called by the Android system, by using the Java class as identifier.
ex:
Intent i = new Intent(this, ActivityTwo.class);
Implicit Intents:
Implicit intents specify the action which should be performed and optionally data which provides data for the action.
ex:
Intent i = new Intent(Intent.ACTION_VIEW, Uri.parse("http://www.vogella.com"));
startActivity(i);
說明:
The most commonly used intent filter is an action,


2013年8月15日 星期四


儲存activity的資料
protected void onSaveInstanceState(Bundle outState);
onSaveInstanceState is called before onPause(), onStop(), and onDestroy()
將資料存到bundle,之後再從bundle讀取
ex:
@Override
public void onSaveInstanceState(Bundle savedInstanceState) {
super.onSaveInstanceState(savedInstanceState);
savedInstanceState.putInt("currentIndex", mCurrentIndex);
}
說明: 儲存
@Override
protected void onCreate(Bundle savedInstanceState) {
super.onCreate(savedInstanceState);
if (savedInstanceState != null) {
mCurrentIndex = savedInstanceState.getInt(KEY_INDEX, 0);
}
}
說明: 讀取, 也可以override onRestoreInstanceState method讀取儲存的資料。
當使用者從App主畫面按下back鍵,存到bundle的資料將被清空
當使用者從App主畫面按下back鍵,存到bundle的資料將被清空
畫面的轉向(rotate)
設定不同方向時,採用不用的activity layout
landscape時將讀取layout-land資料夾

rotate emulator:
Mac: ctrl + fn + f12
限制轉向
設定AndroidManifest.xml 裡的activity
ex:
<activity
android:name=".FoodDetailActivity"
android:label="@string/app_name"
android:screenOrientation="portrait" >
</activity>
activity life cycle
App用到的activity 必須要記錄在AndroidManifest.xml
ex:
<?xml version="1.0" encoding="utf-8"?>
<manifest xmlns:android="http://schemas.android.com/apk/res/android"
package="com.example.hana"
android:versionCode="1"
android:versionName="1.0" >
<uses-sdk
android:minSdkVersion="8"
android:targetSdkVersion="17" />
<application
android:allowBackup="true"
android:icon="@drawable/ic_launcher"
android:label="@string/app_name"
android:theme="@style/AppTheme" >
<activity
android:name="com.example.hanana.MainActivity"
android:label="@string/app_name" >
<intent-filter>
<action android:name="android.intent.action.MAIN" />
<category android:name="android.intent.category.LAUNCHER" />
</intent-filter>
</activity>
<activity
android:name=".CheatActivity"
android:label="@string/app_name" />
</application>
</manifest>
說明:
指定android:name時,開頭的package name可以用一點簡寫,如果package name等於manifest的package name。


於App的主畫面按下back鍵: 結束App, activity的onDestroy被呼叫
按下home鍵: App進入背景,onStop被呼叫
activity被destroy的case:
1. 當runtime configuration改變時,比方畫面轉向時,原本的activity會被destroy,產生新的activity。
2. 當系統需要更多的記憶體,而activity在paused or stopped狀態
Changing the screen orientation destroys and re-creates the activity from scratch.
Pressing the Home key pauses the activity but does not destroy it.
Pressing the application icon might start a new instance of the activity, even if the old one was not destroyed.
Letting the screen sleep pauses the activity, and the screen awakening resumes it. (This is similar to taking an incoming phone call.)
圖片處理
drawable-ldpi : 120 dpi
drawable-mdpi : 160 dpi
drawable-hdpi : 240 dpi
drawable-xhdpi : 320 dpi
drawable-xxhdpi : 480 dpi

加入圖片到資料夾下後,將自動產生圖片的resource ID

從XML設定圖片
ex:
<Button
android:id="@+id/next_button"
android:layout_width="wrap_content"
android:layout_height="wrap_content"
android:text="@string/next_button"
android:drawableRight="@drawable/arrow_right"
android:drawablePadding="4dp" />
To adjust for the different device screen densities, we need to follow a 3:4:6:8 scaling ratio between the four density sizes. (For the iPhone, it’s easy: it’s just a 2:1 ratio between the iPhone 4 and 3GS.) Using our ratios and some simple math, we can create four different versions of our bitmap to hand off to our developer for production:
75 × 75 for low-density screens (i.e. ×0.75);
100 × 100 for medium-density screens (our baseline);
150 × 150 for high-density screens (×1.5);
200 × 200 for extra high-density screens (×2.0). (We’re concerned with only lDPI, mDPI and hDPI for Android smartphone apps.)
reference:
http://mobile.smashingmagazine.com/2011/06/30/designing-for-android/
http://developer.android.com/design/style/iconography.html
訂閱:
文章 (Atom)