up button 和 back button的比較:
up: 回到前一頁或是某個頁面
back: 回上一步,比方收起鍵盤
顯示up button
public void onCreate(Bundle savedInstanceState) {
super.onCreate(savedInstanceState);
ActionBar actionBar = getActionBar();
actionBar.setDisplayHomeAsUpEnabled(true);
}
判斷up button 被點選
public boolean onOptionsItemSelected(MenuItem item) {
switch (item.getItemId()) {
// Respond to the action bar's Up/Home button
case android.R.id.home:
this.finish();
return true;
}
return super.onOptionsItemSelected(item);
}
2013年10月25日 星期五
2013年10月24日 星期四


讓EditText的cursor color等於文字顏色
設定 textCursorDrawable
<EditText
android:layout_width="30dp"
android:layout_height="44dp"
android:textColor="#000000"
android:textSize="14sp"
android:paddingLeft="6dp"
android:textCursorDrawable="@null"
/>
<EditText
android:layout_width="30dp"
android:layout_height="44dp"
android:textColor="#000000"
android:textSize="14sp"
android:paddingLeft="6dp"
android:textCursorDrawable="@null"
/>
delete file
ex:
File file = new File(context.getFilesDir(), "plan.txt");
try {
file.getCanonicalFile().delete();
} catch (IOException e) {
// TODO Auto-generated catch block
e.printStackTrace();
}
File file = new File(context.getFilesDir(), "plan.txt");
try {
file.getCanonicalFile().delete();
} catch (IOException e) {
// TODO Auto-generated catch block
e.printStackTrace();
}
2013年10月23日 星期三
back多層activity
ex:
A -> B - > C
想要從C返回A
C.java:
Intent intent = new Intent(this, A.class);
intent.setFlags(Intent.FLAG_ACTIVITY_CLEAR_TOP);
startActivity(intent);
AndroidManifest.xml:
<activity
android:name="com.passionbean.fitmi.A"
android:label="@string/app_name"
android:screenOrientation="portrait"
android:launchMode="singleTask"
>
</activity>
2013年10月22日 星期二
設定action bar的title
XML:
利用android:label
ex:
<activity
android:name=".RegisterActivity"
android:label="註冊新帳號"
android:screenOrientation="portrait"
android:windowSoftInputMode="stateHidden"
>
JAVA:
ActionBar ab = getActionBar();
ab.setTitle("My Title");
利用android:label
ex:
<activity
android:name=".RegisterActivity"
android:label="註冊新帳號"
android:screenOrientation="portrait"
android:windowSoftInputMode="stateHidden"
>
JAVA:
ActionBar ab = getActionBar();
ab.setTitle("My Title");
2013年10月21日 星期一
讀檔產生圖片Bitmap
File storageDir = new File(
Environment.getExternalStoragePublicDirectory(
Environment.DIRECTORY_PICTURES
),
"FitMi"
);
File imageFile = new File(storageDir.getPath(), "test.jpg");
Bitmap bitmap = BitmapFactory.decodeFile(imageFile.getAbsolutePath());
2013年10月15日 星期二
存取專案裡assets下的檔案
ex:
AssetManager assetManager = getAssets();
try {
InputStream input = assetManager.open("Message.plist");
} catch (Exception e) {
e.printStackTrace();
}
2013年10月14日 星期一
當按下enter時收起鍵盤
EditText nameEditText = (EditText)this.findViewById(R.id.editBasicNameEditText);
OnKeyListener keyboardListener = new OnKeyListener()
{
/**
* This listens for the user to press the enter button on
* the keyboard and then hides the virtual keyboard
*/
public boolean onKey(View arg0, int arg1, KeyEvent event) {
// If the event is a key-down event on the "enter" button
if ( (event.getAction() == KeyEvent.ACTION_DOWN ) &&
(arg1 == KeyEvent.KEYCODE_ENTER) )
{
InputMethodManager imm = (InputMethodManager)getSystemService(INPUT_METHOD_SERVICE);
imm.toggleSoftInput(InputMethodManager.HIDE_IMPLICIT_ONLY, 0);
return true;
}
return false;
}
} ;
nameEditText.setOnKeyListener(keyboardListener);
2013年10月1日 星期二
AChartEngine
http://code.google.com/p/achartengine/
1. 在折線圖上顯示出每個點的值
((XYSeriesRenderer) renderer.getSeriesRendererAt(0)).setDisplayChartValues(true);
2. not show legend item
((XYSeriesRenderer) renderer.getSeriesRendererAt(0)).setShowLegendItem(false);

3. 改變X, Y軸上label的color
ex:
renderer.setYLabelsColor(0, Color.BLACK);
4. 設定線條顏色
int[] colors = new int[] { Color.rgb(30, 155, 165)};
PointStyle[] styles = new PointStyle[] { PointStyle.CIRCLE };
renderer = buildRenderer(colors, styles);
5. 設定線條粗細
renderer = buildRenderer(colors, styles);
int length = renderer.getSeriesRendererCount();
for (int i = 0; i < length; i++) {
XYSeriesRenderer seriesRenderer = ((XYSeriesRenderer) renderer.getSeriesRendererAt(i));
seriesRenderer.setLineWidth(3f);
}
6. 設定point
renderer.setPointSize(10);
1. 在折線圖上顯示出每個點的值
((XYSeriesRenderer) renderer.getSeriesRendererAt(0)).setDisplayChartValues(true);
2. not show legend item
((XYSeriesRenderer) renderer.getSeriesRendererAt(0)).setShowLegendItem(false);
hide 紅色圈起的部分

3. 改變X, Y軸上label的color
ex:
renderer.setYLabelsColor(0, Color.BLACK);
4. 設定線條顏色
int[] colors = new int[] { Color.rgb(30, 155, 165)};
PointStyle[] styles = new PointStyle[] { PointStyle.CIRCLE };
renderer = buildRenderer(colors, styles);
5. 設定線條粗細
renderer = buildRenderer(colors, styles);
int length = renderer.getSeriesRendererCount();
for (int i = 0; i < length; i++) {
XYSeriesRenderer seriesRenderer = ((XYSeriesRenderer) renderer.getSeriesRendererAt(i));
seriesRenderer.setLineWidth(3f);
}
6. 設定point
renderer.setPointSize(10);
2013年9月29日 星期日
write & read object to file by Serializable
ex:
public class FitPlan implements Serializable {
public long startDateNumber;
public long endDateNumber;
public float targetWeight;
public float startWeight;
public String name;
public int calorieQuota;
public int bmr;
public float workPercentage;
public String uuid;
public void writeToFile(Context context)
{
File file = new File(context.getFilesDir(), "plan.txt");
try {
FileOutputStream fos = new FileOutputStream(file);
ObjectOutputStream oos = new ObjectOutputStream(fos);
oos.writeObject(this);
oos.close();
} catch (Exception e) {
// TODO Auto-generated catch block
e.printStackTrace();
}
}
public static FitPlan createFromFile(Context context)
{
File file = new File(context.getFilesDir(), "plan.txt");
FitPlan plan = null;
try{
FileInputStream fis = new FileInputStream(file);
ObjectInputStream in = new ObjectInputStream(fis);
plan = (FitPlan) in.readObject();
in.close();
} catch (Exception e) {
// TODO Auto-generated catch block
e.printStackTrace();
}
return plan;
}
}
說明
FitPlan的每個欄位也都必須是Serializable,才能寫入檔案。
不想寫入檔案的欄位,可加上transient
2013年9月23日 星期一
取得前一天/後一天的時間
currentDate的類別是Time
void preDay() {
this.currentDate.monthDay -= 1;
this.currentDate.normalize(true);
}
void nextDay() {
this.currentDate.monthDay += 1;
this.currentDate.normalize(true);
}
2013年9月17日 星期二
從Finder打開檔案
1. 設定External Tools Configuration

2. 新增打開Finder的指令
輸入Location : /usr/bin/open
Arguments: ${container_loc}

3. 點選檔案
4. 點選finder

2013年9月11日 星期三
取得screen的大小
DisplayMetrics displaymetrics = new DisplayMetrics();
getWindowManager().getDefaultDisplay().getMetrics(displaymetrics);
int width = displaymetrics.widthPixels;
int height = displaymetrics.heightPixels;
2013年9月10日 星期二
設定action bar的title color
ex
<style name="MyTitleTextStyle" parent="@android:style/TextAppearance">
<item name="android:textColor">#000000</item>
</style>
<style name="MyActionBar" parent="android:Widget.Holo.ActionBar">
<item name="android:background">@android:color/transparent</item>
<item name="android:titleTextStyle">@style/MyTitleTextStyle</item>
</style>
<style name="FitMiTheme" parent="@android:style/Theme.Holo">
<item name="android:windowActionBarOverlay">true</item>
<item name="android:actionMenuTextColor">#0000ff</item>
<item name="android:actionBarStyle">@style/MyActionBar</item>
</style>
設定action bar上button icon
<menu xmlns:android="http://schemas.android.com/apk/res/android" >
<item
android:id="@+id/action_settings"
android:showAsAction="always"
android:icon="@drawable/setting"/>
</menu>
移除action bar divider
ex:
<style name="MyActionBar" parent="android:Widget.Holo.ActionBar">
<item name="android:background">@android:color/transparent</item>
</style>
<style name="FitMiTheme" parent="@android:style/Theme.Holo">
<item name="android:windowActionBarOverlay">true</item>
<item name="android:actionMenuTextColor">#0000ff</item>
<item name="android:actionBarStyle">@style/MyActionBar</item>
</style>
2013年9月9日 星期一
write bitmap to file
ex:
File imageFile;
Bitmap bitmap;
FileOutputStream out = new FileOutputStream(imageFile);
bitmap.compress(Bitmap.CompressFormat.JPEG, 100, out);
save file in external storage
1. 設定權限 in AndroidManifest.xml
<?xml version="1.0" encoding="utf-8"?>
<manifest xmlns:android="http://schemas.android.com/apk/res/android"
package="com.passionbean.fitmi"
android:versionCode="1"
android:versionName="1.0" >
<uses-sdk
android:minSdkVersion="11"
android:targetSdkVersion="17" />
<uses-permission android:name="android.permission.WRITE_EXTERNAL_STORAGE"/>
<application
android:allowBackup="true"
2. 建立file
File albumDir = new File(
Environment.getExternalStoragePublicDirectory(
Environment.DIRECTORY_PICTURES
),
"FitMi"
);
if(albumDir.exists() == false)
{
albumDir.mkdir();
}
File imageFile = new File(albumDir.getPath(), "test.jpg");
2013年9月6日 星期五
AlertDialog的使用
ex:
AlertDialog.Builder alertDialogBuilder = new AlertDialog.Builder(
AddFoodActivity.this);
alertDialogBuilder.setTitle("選擇來源");
alertDialogBuilder.setCancelable(true)
.setPositiveButton("拍照",new DialogInterface.OnClickListener() {
public void onClick(DialogInterface dialog,int id) {
// if this button is clicked, close
// current activity
Intent i = new Intent(MediaStore.ACTION_IMAGE_CAPTURE);
startActivityForResult(i, CAPTURE_IMAGE_ACTIVITY_REQ );
}
})
.setNeutralButton("相簿",new DialogInterface.OnClickListener() {
public void onClick(DialogInterface dialog,int id) {
// if this button is clicked, just close
// the dialog box and do nothing
Intent i = new Intent(Intent.ACTION_GET_CONTENT);
i.setType("image/*");
startActivityForResult(i, ALBUM_IMAGE_ACTIVITY_REQ );
}
})
.setNegativeButton("取消", new DialogInterface.OnClickListener() {
public void onClick(DialogInterface dialog,int id) {
// if this button is clicked, just close
// the dialog box and do nothing
dialog.cancel();
}
});
AlertDialog alertDialog = alertDialogBuilder.create();
alertDialog.show();
建立list單選的dialog:
final CharSequence[] items = {"靜態活動(大部份時間都坐著)", "輕度活動(每天散步的人)", "中度活動(每天做劇烈運動的人)",
"重度活動(參與每日體育訓練的人)" };
AlertDialog.Builder builder = new AlertDialog.Builder(this);
builder.setTitle("工作活動量")
.setItems(items, new DialogInterface.OnClickListener() {
public void onClick(DialogInterface dialog, int which) {
// The 'which' argument contains the index position
// of the selected item
}
});
AlertDialog alertDialog = builder.create();
alertDialog.show();
2013年9月3日 星期二
ViewPager的使用
建立頁面UI元件
public Object instantiateItem(View container, int position)
delete頁面UI元件
public void destroyItem(View arg0, int arg1, Object arg2)
更新ViewPager
ex:
ImageAdapter adapter = (ImageAdapter)viewPager.getAdapter();
viewPager.setAdapter (null);
viewPager.setCurrentItem(newIndex);
viewPager.setAdapter (adapter);
2013年9月2日 星期一
UI文字設定 (font)
XML:
ex:
<Button
android:id="@+id/addFoodCategoryBreakfastButton"
android:layout_width="80dp"
android:layout_height="30dp"
android:layout_marginTop="10dp"
android:layout_marginLeft="10dp"
android:text="早餐"
android:textColor="#000000"
android:textSize="12sp"
android:background="@drawable/roundcornerforaddfoodcategorybutton"
/>
設定圓角
1. 新增設定圓角圖形的XML在res/drawable下
ex: 新增roundcorner.xml
<?xml version="1.0" encoding="utf-8"?>
<shape xmlns:android="http://schemas.android.com/apk/res/android"
android:shape="rectangle">
<corners android:radius="8dp" />
<solid android:color="#7fc7b299" />
</shape>
ex:
<corners android:bottomRightRadius="8dp" android:bottomLeftRadius="8dp"
android:topLeftRadius="0dp" android:topRightRadius="0dp"/>
說明:
solid欄位設定圖形的背景顏色
2. 在layout的xml指定background為roundcorner
ex:
<View
android:id="@+id/addFoodCategoryBackground"
android:layout_width="100dp"
android:layout_height="100dp"
android:layout_marginTop="10dp"
android:layout_marginLeft="10dp"
android:layout_below="@+id/addFoodDateTitleImageView"
android:layout_toRightOf="@+id/addFoodPhotoButton"
android:background="@drawable/roundCorner"
/>
2013年8月29日 星期四
防止鍵盤因為ScrollView上有EditText而自動彈出
修改AndroidManifest.xml,於scroll view對應的activity裡設定windowSoftInputMode
ex:
<activity
android:name=".AddFoodActivity"
android:label="@string/app_name"
android:windowSoftInputMode="stateHidden" >
</activity>
ex:
<activity
android:name=".AddFoodActivity"
android:label="@string/app_name"
android:windowSoftInputMode="stateHidden" >
</activity>

2013年8月28日 星期三
2013年8月27日 星期二
設定action bar
XML
<menu xmlns:android="http://schemas.android.com/apk/res/android" >
<item
android:id="@+id/action_done"
android:showAsAction="always"
android:title="完成"
/>
</menu>
JAVA
@Override
public boolean onCreateOptionsMenu(Menu menu) {
// Inflate the menu items for use in the action bar
MenuInflater inflater = getMenuInflater();
inflater.inflate(R.menu.done, menu);
return super.onCreateOptionsMenu(menu);
}
@Override
public boolean onCreateOptionsMenu(Menu menu) {
// Inflate the menu items for use in the action bar
MenuInflater inflater = getMenuInflater();
inflater.inflate(R.menu.done, menu);
return super.onCreateOptionsMenu(menu);
}
button被點選
public boolean onOptionsItemSelected(MenuItem item) {
return true;
}
設定透明顏色
XML:
<ImageButton
android:layout_width="wrap_content"
android:layout_height="wrap_content"
android:layout_toRightOf="@+id/addFecesDiarrheaButton"
android:layout_alignBottom="@+id/addFecesCountLabel"
android:src="@drawable/irregularity"
android:background="@android:color/transparent"
/>
JAVA:
addFoodButton.setBackgroundColor(Color.TRANSPARENT);
2013年8月26日 星期一
利用picker設定日期和時間
ex:
dateButton.setOnClickListener(new View.OnClickListener() {
@Override
public void onClick(View v) {
// TODO Auto-generated method stub
DatePickerDialog dialog = new DatePickerDialog(AddFecesActivity.this, new DatePickerDialog.OnDateSetListener() {
@Override
public void onDateSet(DatePicker view, int year, int monthOfYear,
int dayOfMonth) {
// TODO Auto-generated method stub
currentTime.set(0, currentTime.minute, currentTime.hour, dayOfMonth,
monthOfYear,year);
String timeStr = currentTime.format("%Y-%m-%d");
dateButton.setText(timeStr);
}
}, currentTime.year, currentTime.month, currentTime.monthDay);
dialog.show();
}
});
timeButton.setOnClickListener(new View.OnClickListener() {
@Override
public void onClick(View v) {
// TODO Auto-generated method stub
TimePickerDialog dialog = new TimePickerDialog(AddFecesActivity.this, new TimePickerDialog.OnTimeSetListener(){
@Override
public void onTimeSet(TimePicker view, int hourOfDay, int minute) {
currentTime.set(0, minute, hourOfDay, currentTime.monthDay,
currentTime.month+1, currentTime.year);
String timeStr = currentTime.format("%H:%M");
timeButton.setText(timeStr);
}
}, currentTime.hour, currentTime.minute,
false);
dialog.show();
}
});
XML Drawables
Layer List
State List
Level List
TransitionDrawable
InsetDrawable
ClipDrawable
ScaleDrawable
ShapeDrawable
http://www.vogella.com/articles/AndroidDrawables/article.html
9-patch image
http://radleymarx.com/blog/simple-guide-to-9-patch/
http://www.ootpapps.com/2013/02/android-9-patch-imageshow-they-work-and-how-to-create-them/


http://www.ootpapps.com/2013/02/android-9-patch-imageshow-they-work-and-how-to-create-them/


draw 9 patch image
draw9patch
2013年8月25日 星期日
fragment
A Fragment represents a behavior or a portion of user interface in an Activity. You can combine multiple fragments in a single activity to build a multi-pane UI and reuse a fragment in multiple activities. You can think of a fragment as a modular section of an activity, which has its own lifecycle, receives its own input events, and which you can add or remove while the activity is running (sort of like a "sub activity" that you can reuse in different activities).
AdapterView
You have a data set, you throw it at an Adapter, and you end up with views in your layout

ex:
ListView


Adapter is the interface that takes a data set and returns views representing that data. The adapter is able to say how many items there are, return an item for a specific position, and return the view associated with a position, among other things. For a ListView, you will use the ListAdapter interface that extends Adapter to add a couple of list-specific methods. Similarly, you will use the SpinnerAdapter interface for use in a Spinner.

ex:
ListView

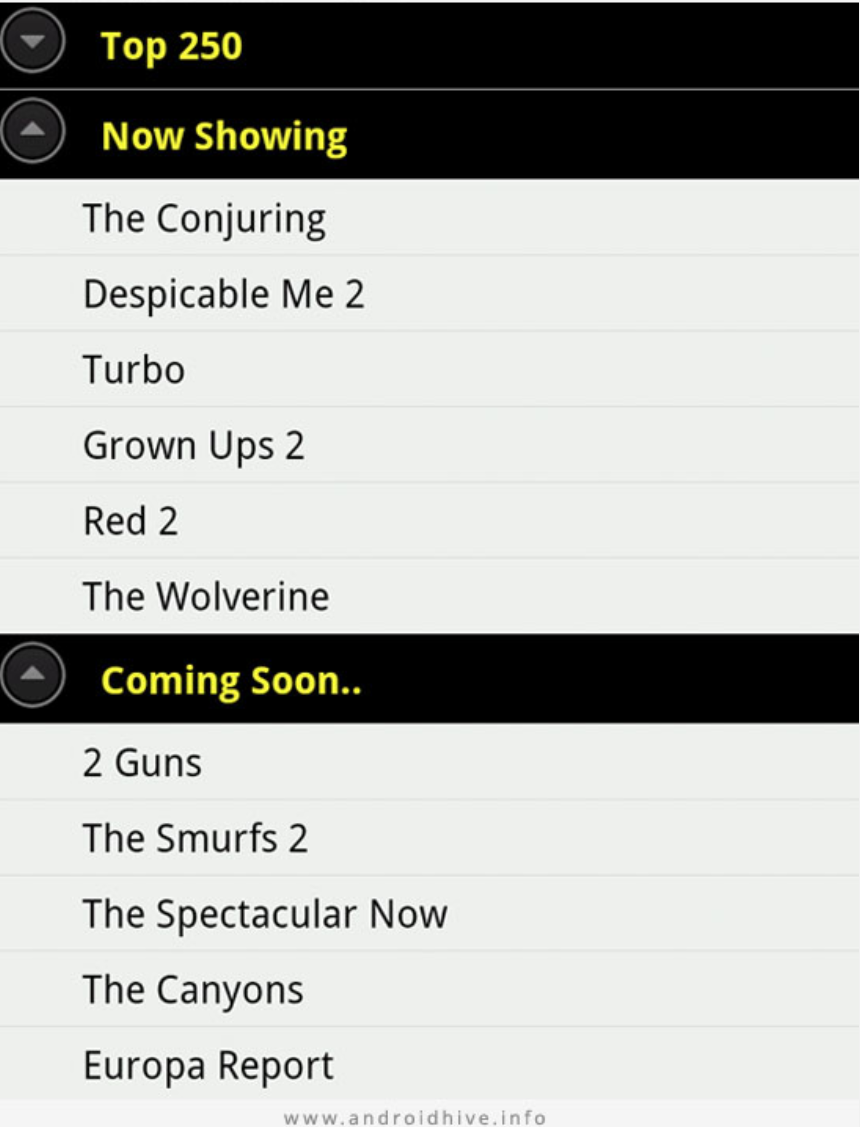
ExpandableListView
group list data by categories. It has the capability of expanding and collapsing the groups when user touches header.
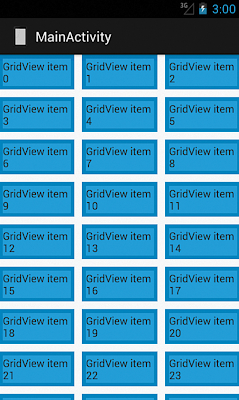
GridView

Spinner

ViewPager
gravity and layout_gravity
android:gravity sets the gravity of the content of the View its used on.
android:layout_gravity sets the gravity of the View or Layout in its parent.
ex:
<Button
android:id="@+id/addFoodDateButton"
android:layout_width="140dp"
android:layout_height="40dp"
android:layout_marginTop="12dp"
android:layout_marginLeft="12dp"
android:textColor="#000000"
android:background="@android:color/transparent"
android:layout_toRightOf="@id/addFoodDateTitleImageView"
android:text="2013-09-12"
android:gravity="left|center_vertical"
/>
android:gravity
center_vertical, top , bottom
ex:
calorieTextView.setGravity(Gravity.CENTER);
ViewGroup
the ViewGroup class is for views that can contain one or more child views. ViewGroup provides the standardized methods for these classes to use so that they can perform tasks such as adding, removing, getting, and counting child views.
Iterating through a ViewGroup’s Children
ex:
final int childCount = myViewGroup.getChildCount();
for (int i = 0; i < childCount; i++) {
View v = myViewGroup.getChildAt(i);
// Do something with the View
}
FrameLayout
LinearLayout
RelativeLayout
ListView
GridView
Spinner
ViewPager
AdapterViewAnimator
AdapterViewFlipper
AppWidgetHostView
DialerFilter
FragmentBreadCrumbs
GestureOverlayView
GridLayout
HorizontalScrollView
ImageSwitcher
MediaController
PagerTabStrip
PagerTitleStrip
ScrollView
SearchView
SlidingDrawer
StackView
TabHost
TabWidget
TableLayout
TableRow
TextSwitcher
ViewAnimator
ViewFlipper
ViewSwitcher
ZoomControls
圖片縮放
scaleType


resize bitmap:
int width = 1000;
int height = 500;
Bitmap resizeBitmap = Bitmap.createScaledBitmap(oldBitmap, width, height, true);
JAVA:
categoryButton.setScaleType(ImageView.ScaleType.FIT_XY );
XML:
<ImageButton
android:id="@+id/foodDetailBigBut"
android:layout_width="match_parent"
android:layout_height="match_parent"
android:layout_alignTop="@+id/foodDetailViewPager"
android:layout_alignLeft="@+id/foodDetailViewPager"
android:src="@drawable/bigbut"
android:scaleType="fitXY"
android:background="@android:color/transparent"
/>
維持比例縮放: centerCrop & centerInside
不維持比例,縮放到指定的大小: fitXY
android UI元件基本介紹
TextView: 顯示文字
EditText: 輸入文字
Button: 按鈕
ImageView: 顯示圖片
ImageButton: 顯示圖片的button
CheckBox, RadioButton, Switch , ToggleButton


TimePicker
 AnalogClock

Chronometer
DigitalClock
KeyboardView
MediaRouteButton
QuickContactBadge
ProgressBar

WebView
VideoView
EditText: 輸入文字
Button: 按鈕
ImageView: 顯示圖片
ImageButton: 顯示圖片的button
CheckBox, RadioButton, Switch , ToggleButton

CalendarView

CheckedTextView
DatePicker
RatingBar

SeekBar
Spinner


Chronometer
DigitalClock
KeyboardView
MediaRouteButton
QuickContactBadge
ProgressBar
WebView
VideoView
2013年8月23日 星期五


2013年8月22日 星期四
鍵盤(keyboard)樣式

設定inputType
ex:
<EditText android:layout_width="match_parent"
android:layout_height="40dp"
android:inputType="textEmailAddress"
android:layout_marginTop="10dp"
android:textColor="#000000"/>
輸入數字和小數點: numberDecimal
只能輸入數字:
android:inputType="phone"
android:digits="1234567890"
設定顏色(color)和顏色的透明度
在XML裡設定
ex:
<EditText android:layout_width="match_parent"
android:layout_height="40dp"
android:inputType="textEmailAddress"
android:layout_marginTop="10dp"
android:textColor="#000000"/>
如果有4個byte,第一個byte設定透明度
ex:
#00000000
從Java設定
ex:
seperatorView.setBackgroundColor(Color.argb(51, 255, 255, 255));
wordTextView2.setTextColor(Color.rgb(0,0,0));
ex:
calorieView.getBackground().setAlpha(127);
ex:
<EditText android:layout_width="match_parent"
android:layout_height="40dp"
android:inputType="textEmailAddress"
android:layout_marginTop="10dp"
android:textColor="#000000"/>
如果有4個byte,第一個byte設定透明度
ex:
#00000000
從Java設定
ex:
seperatorView.setBackgroundColor(Color.argb(51, 255, 255, 255));
wordTextView2.setTextColor(Color.rgb(0,0,0));
ex:
calorieView.getBackground().setAlpha(127);


margin and padding
margin: 外部間距,和其它UI元件的間距
padding: 內部間距,UI元件自己內部的間距

ex:
android:paddingBottom="20dp"
ex:
layoutParams.setMargins(0, normalCalorieTextViewStartY, 0, 0);
padding: 內部間距,UI元件自己內部的間距

ex:
android:paddingBottom="20dp"
ex:
layoutParams.setMargins(0, normalCalorieTextViewStartY, 0, 0);
2013年8月20日 星期二
action bar overlay
設定action bar overlay ( themes.xml)
<resources>
<style name="FitMiTheme" parent="@android:style/Theme.Holo">
<item name="android:windowActionBarOverlay">true</item>
</style>
設定UI在action bar之後
從XML
<LinearLayout android:layout_width="match_parent"
android:layout_height="wrap_content"
android:orientation="horizontal"
android:paddingTop="?android:attr/actionBarSize" >
從Java
TypedValue tv = new TypedValue();
this.getTheme().resolveAttribute(android.R.attr.actionBarSize, tv, true);
int actionBarHeight = getResources().getDimensionPixelSize(tv.resourceId);
layoutParams.setMargins(0, actionBarHeight, 0, 0);
layout
for layout_height & layout_width:
match_parent & wrap_content
relative layout:
http://developer.android.com/reference/android/widget/RelativeLayout.LayoutParams.html
it also allows you to create overlapping views and views that appear to float on top of others.

linear layout :
延著水平或垂直排列
android:orientation="horizontal"
或
android:orientation="vertical"
ex:
<LinearLayout android:layout_width="match_parent"
android:layout_height="wrap_content"
android:orientation="horizontal" >
<Button android:text="add"
android:layout_width="0px"
android:layout_height="wrap_content"
android:layout_weight="1"
/>
FrameLayout
<Button android:text="subtract"
android:layout_width="0px"
android:layout_height="wrap_content"
android:layout_weight="1"
/>
</LinearLayout>
說明:
一樣的weight,兩個button平分畫面 。記得width的寬度要設成0px。
FrameLayout
http://www.onlymobilepro.com/2012/05/22/android-frame-layout-for-absolute-beginner/
一層一層疊view。
java:
layoutParams.addRule(RelativeLayout.BELOW, titleTextView.getId());
RelativeLayout.LayoutParams layoutParams = new RelativeLayout.LayoutParams(
LayoutParams.MATCH_PARENT, LayoutParams.MATCH_PARENT);
match_parent & wrap_content
relative layout:
http://developer.android.com/reference/android/widget/RelativeLayout.LayoutParams.html
it also allows you to create overlapping views and views that appear to float on top of others.

ex:
android:layout_centerHorizontal="true"
android:layout_toRightOf="@+id/addPeriodStartDateTitleImageView"
linear layout :
延著水平或垂直排列
android:orientation="horizontal"
或
android:orientation="vertical"
ex:
<LinearLayout android:layout_width="match_parent"
android:layout_height="wrap_content"
android:orientation="horizontal" >
<Button android:text="add"
android:layout_width="0px"
android:layout_height="wrap_content"
android:layout_weight="1"
/>
FrameLayout
<Button android:text="subtract"
android:layout_width="0px"
android:layout_height="wrap_content"
android:layout_weight="1"
/>
</LinearLayout>
說明:
一樣的weight,兩個button平分畫面 。記得width的寬度要設成0px。
FrameLayout
http://www.onlymobilepro.com/2012/05/22/android-frame-layout-for-absolute-beginner/
一層一層疊view。
java:
layoutParams.addRule(RelativeLayout.BELOW, titleTextView.getId());
RelativeLayout.LayoutParams layoutParams = new RelativeLayout.LayoutParams(
LayoutParams.MATCH_PARENT, LayoutParams.MATCH_PARENT);
設定背景圖片或背景顏色
每個UI元件都有background attribute
設定activity的xml:
<RelativeLayout xmlns:android="http://schemas.android.com/apk/res/android"
xmlns:tools="http://schemas.android.com/tools"
android:layout_width="match_parent"
android:layout_height="match_parent"
android:background="@drawable/mainbackground"
tools:context=".MainActivity" >
<RelativeLayout xmlns:android="http://schemas.android.com/apk/res/android"
xmlns:tools="http://schemas.android.com/tools"
android:layout_width="match_parent"
android:layout_height="match_parent"
android:background="#000000"
tools:context=".MainActivity" >
theme and style
http://mobile.tutsplus.com/tutorials/android/android-sdk-exploring-styles-and-themes/
1. create values/themes.xml
ex:
<?xml version="1.0" encoding="utf-8"?>
<resources>
<style name="TestTheme" parent="android:Theme.Light">
</style>
</resources>
2. modify AndroidManifest.xml
ex:
<application
android:allowBackup="true"
android:icon="@drawable/ic_launcher"
android:label="@string/app_name"
android:theme="@style/TestTheme" >
2013年8月19日 星期一
App Icon image & Icon title
AndroidManifest.xml
<?xml version="1.0" encoding="utf-8"?>
<manifest xmlns:android="http://schemas.android.com/apk/res/android"
package="com.cookbook.simple_activity"
android:versionCode="1"
android:versionName="1.0">
<application android:icon="@drawable/icon"
android:label="@string/app_name">
<activity android:name=".SimpleActivity"
android:label="@string/app_name">
app version
AndroidManifest.xml
<manifest xmlns:android="http://schemas.android.com/apk/res/android"
package="com.cookbook.simple_activity"
android:versionCode="1"
android:versionName="1.0">
2013年8月18日 星期日

android version
android version比例圖表


AndroidManifest.xml:
設定minimum required SDK version and the target SDK version
ex:
<uses-sdk
android:minSdkVersion="8"
android:targetSdkVersion="17" />
說明:
minSdkVersion: API >= 8 的皆可安裝
Target SDK version: 一般採用最新的SDK
Build SDK version: 一般採用最新的SDK
設定Build SDK Version


檢查device的version
ex:
if (Build.VERSION.SDK_INT >= Build.VERSION_CODES.HONEYCOMB) {
}
API version
http://developer.android.com/guide/topics/manifest/uses-sdk-element.html#ApiLevels

設定起始畫面activity( launcher activity )
在AndroidManifest.xml:
ex:
<application
... >
<activity
android:name="com.bignerdranch.android.geoquiz.QuizActivity"
android:label="@string/app_name" >
<intent-filter>
<action android:name="android.intent.action.MAIN" />
<category android:name="android.intent.category.LAUNCHER" />
</intent-filter>
</activity>
<activity
android:name=".CheatActivity"
android:label="@string/app_name" />
</application>


2013年8月16日 星期五
activity的啟動和返回和intent
intent:
Your app should handle reasonable Intents, which is the class Android uses to indicate what the user is trying to do and to find an appropriate app to accomplish that objective
說明:
android會依據intent尋找相關的App來給使用者挑選
利用intent
public void startActivity(Intent intent);

ex:
Intent i = new Intent(QuizActivity.this, CheatActivity.class);
startActivity(i);
說明:
顯示另一個activity,原本activity的onStop被呼叫.
當按下back鍵後,將回到原來的activity
在activity間傳遞資訊: 透過intent的putExtra & getIntent
ex:
Intent i = new Intent(MainActivity.this, CheatActivity.class);
boolean answerIsTrue = mAnswerKey[mCurrentIndex].isTrueQuestion();
i.putExtra(CheatActivity.EXTRA_ANSWER_IS_TRUE, answerIsTrue);
startActivity(i);
說明:傳送
mAnswerIsTrue = getIntent().getBooleanExtra(EXTRA_ANSWER_IS_TRUE, false);
Getting a result back from a child activity

1.
parent activity呼叫
public void startActivityForResult(Intent intent, int requestCode);
說明 :
之後才能夠取得child activity回傳的資料
2.
child activity呼叫
public final void setResult(int resultCode, Intent data);
說明:
回傳結果和Intent,資料包在intent裡。結果有2種:
Activity.RESULT_OK
Activity.RESULT_CANCELED.
這裡的intent有兩種產生方法:
1. Intent data = new Intent();
2. Intent i = getIntent();
get the intent that start this activity
3. parent activity經由onActivityResult取得資料
ex:
protected void onActivityResult(int requestCode, int resultCode, Intent data) {
if (data == null) {
return;
}
mIsCheater = data.getBooleanExtra(CheatActivity.EXTRA_ANSWER_SHOWN, false);
}
說明:
利用requestCode判斷是從哪個activity回來
返回:
按下back鍵或是activity物件呼叫finish method
Explicit intents:
explicitly defines the component which should be called by the Android system, by using the Java class as identifier.
ex:
Intent i = new Intent(this, ActivityTwo.class);
Implicit Intents:
Implicit intents specify the action which should be performed and optionally data which provides data for the action.
ex:
Intent i = new Intent(Intent.ACTION_VIEW, Uri.parse("http://www.vogella.com"));
startActivity(i);
說明:
The most commonly used intent filter is an action,
Your app should handle reasonable Intents, which is the class Android uses to indicate what the user is trying to do and to find an appropriate app to accomplish that objective
說明:
android會依據intent尋找相關的App來給使用者挑選
利用intent
public void startActivity(Intent intent);

ex:
Intent i = new Intent(QuizActivity.this, CheatActivity.class);
startActivity(i);
說明:
顯示另一個activity,原本activity的onStop被呼叫.
當按下back鍵後,將回到原來的activity
在activity間傳遞資訊: 透過intent的putExtra & getIntent
ex:
Intent i = new Intent(MainActivity.this, CheatActivity.class);
boolean answerIsTrue = mAnswerKey[mCurrentIndex].isTrueQuestion();
i.putExtra(CheatActivity.EXTRA_ANSWER_IS_TRUE, answerIsTrue);
startActivity(i);
說明:傳送
mAnswerIsTrue = getIntent().getBooleanExtra(EXTRA_ANSWER_IS_TRUE, false);
說明: 取得
Getting a result back from a child activity

1.
parent activity呼叫
public void startActivityForResult(Intent intent, int requestCode);
說明 :
之後才能夠取得child activity回傳的資料
2.
child activity呼叫
public final void setResult(int resultCode, Intent data);
說明:
回傳結果和Intent,資料包在intent裡。結果有2種:
Activity.RESULT_OK
Activity.RESULT_CANCELED.
這裡的intent有兩種產生方法:
1. Intent data = new Intent();
2. Intent i = getIntent();
get the intent that start this activity
3. parent activity經由onActivityResult取得資料
ex:
protected void onActivityResult(int requestCode, int resultCode, Intent data) {
if (data == null) {
return;
}
mIsCheater = data.getBooleanExtra(CheatActivity.EXTRA_ANSWER_SHOWN, false);
}
說明:
利用requestCode判斷是從哪個activity回來
返回:
按下back鍵或是activity物件呼叫finish method
Explicit intents:
explicitly defines the component which should be called by the Android system, by using the Java class as identifier.
ex:
Intent i = new Intent(this, ActivityTwo.class);
Implicit Intents:
Implicit intents specify the action which should be performed and optionally data which provides data for the action.
ex:
Intent i = new Intent(Intent.ACTION_VIEW, Uri.parse("http://www.vogella.com"));
startActivity(i);
說明:
The most commonly used intent filter is an action,
訂閱:
文章 (Atom)